...
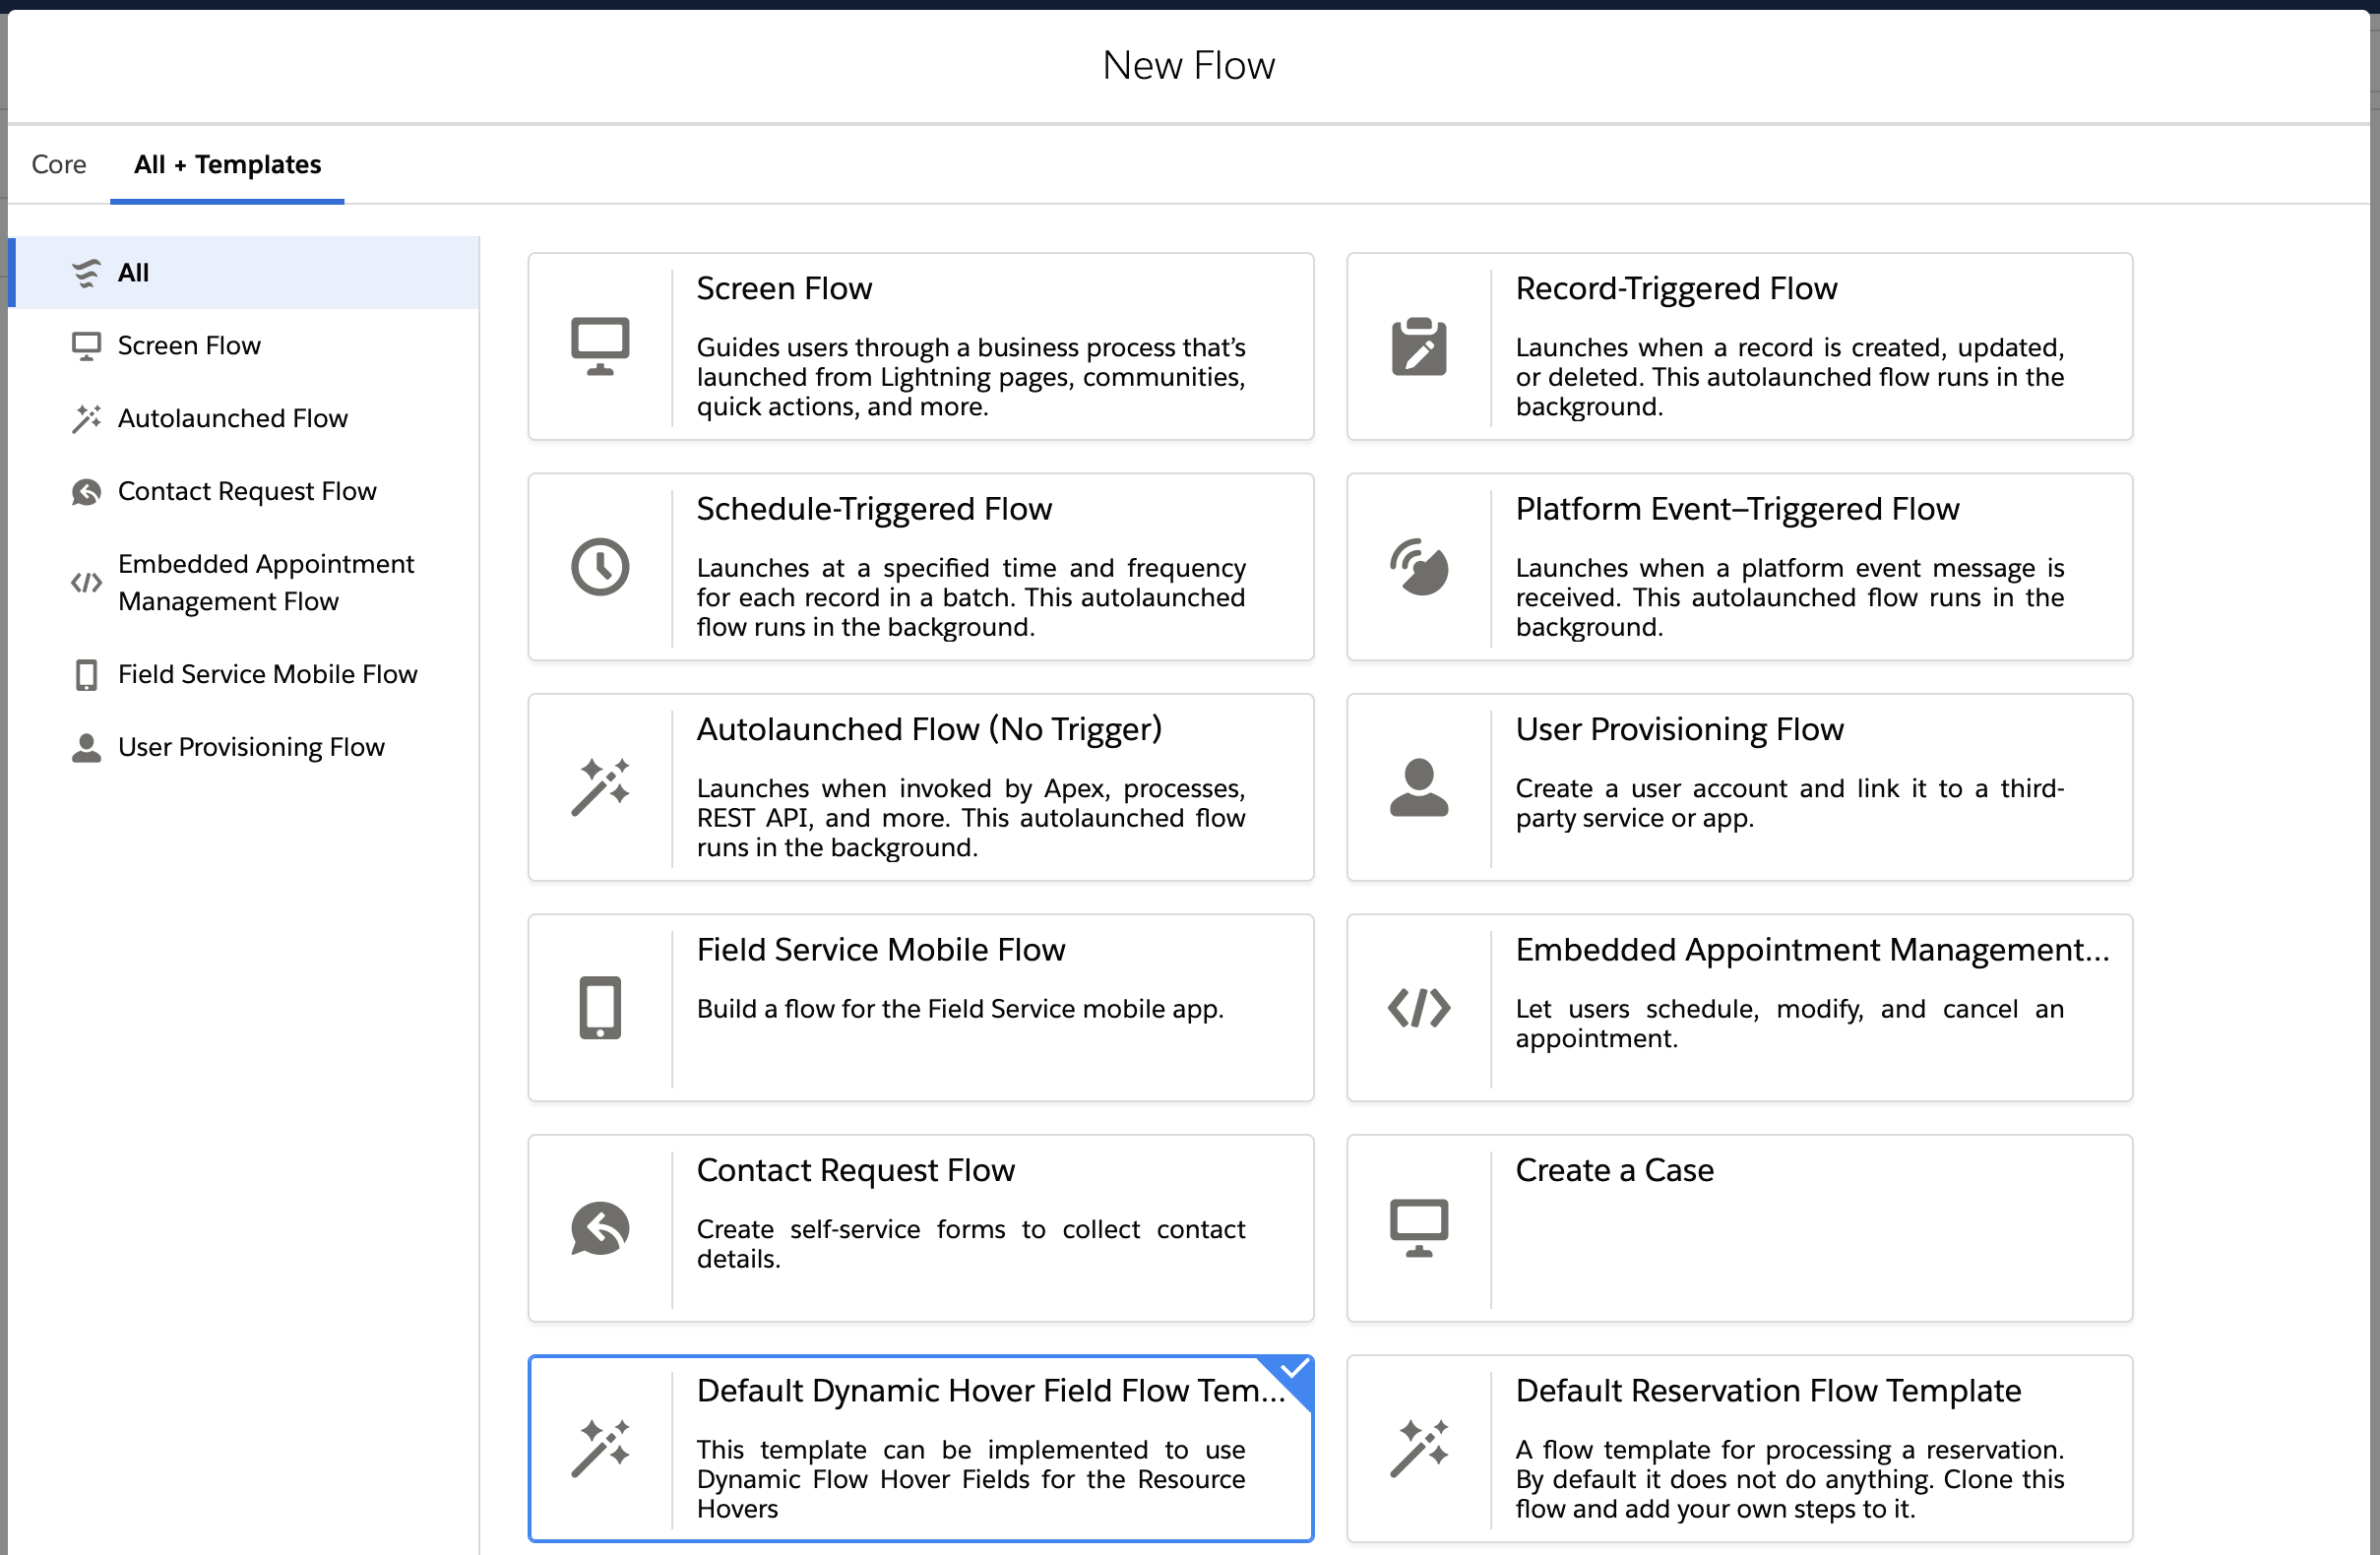
Go to the Salesforce Setup, and open Process Automation > Flows. Then click on New Flow.

Navigate to the All + Templates tab and choose the Default Dynamic Hover Field Flow Template. Then click Next.
You can now create a flow using data available for a given resource for which the hover would be displayed. The following data is available in the Flow:
Record Id - The Id of the record being hovered.
Start Date - The date and time at which the currently selected View on the calendar starts.
End Date - The date and time at which the currently selected View on the calendar ends.
View Name - The name of the currently selected View on the calendar.
List of Reservation IDs - For hovers over dimensions (such as resources) this will contain all the ids of reservations displayed on that row of the calendar. For hovers over reservations, this will contain only the id of the reservation being hovered over.
...
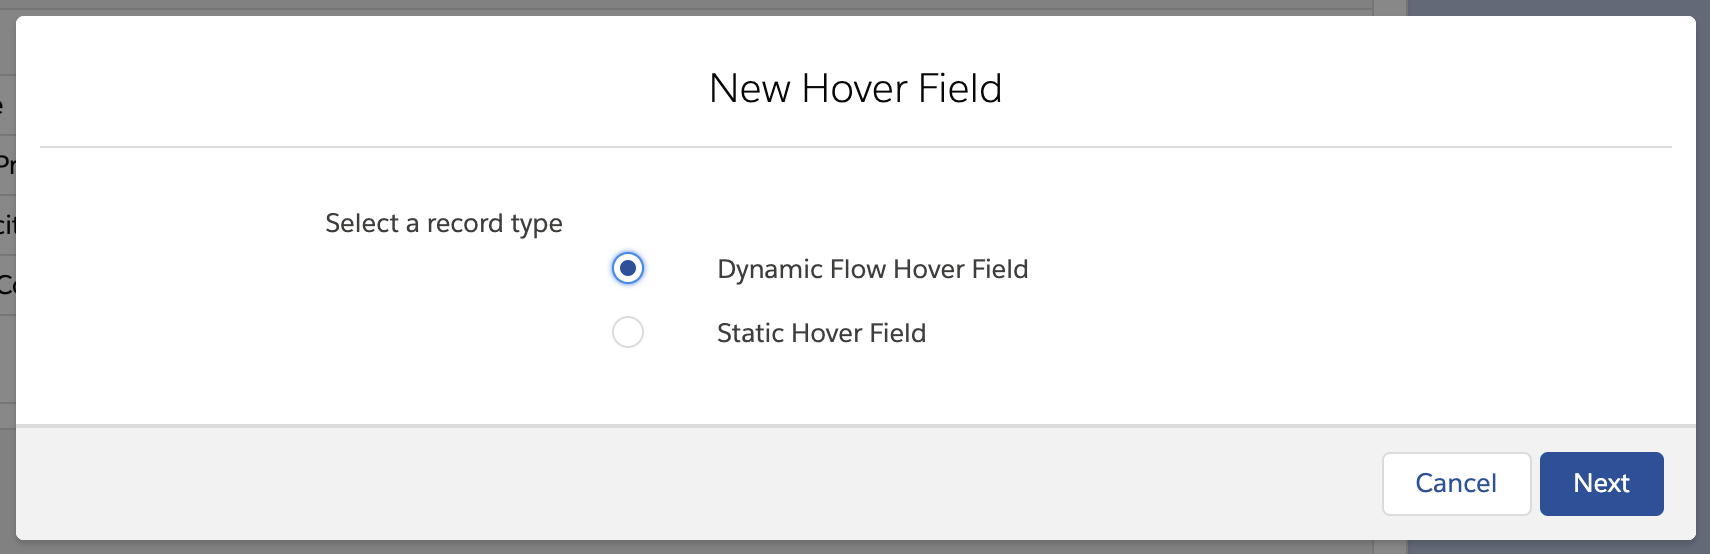
Navigate to the Hover Definition record and open the Related tab. In the top right corner of the Hover Fields related list, click New

Select the Static Dynamic Flow Hover Field and click Next.
For the Name field, you can fill in a name of your choice. For the Flow Name field, fill in the API name of the Flow that you wish to use.
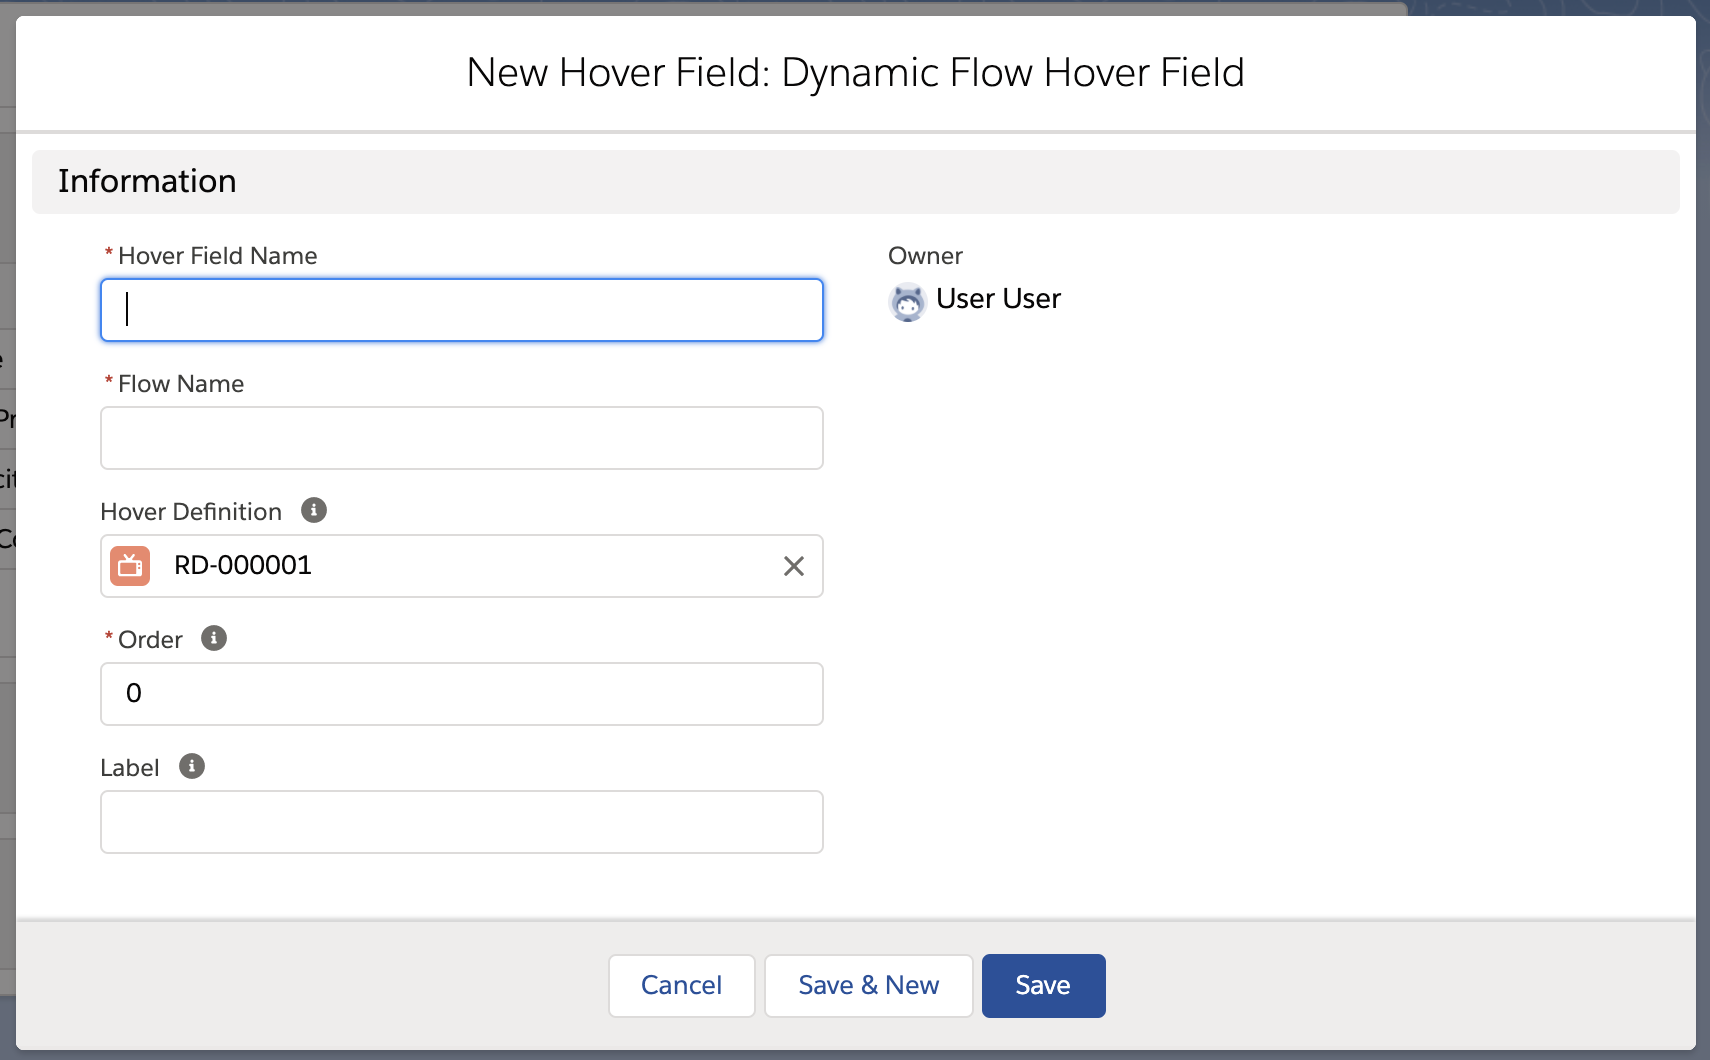
For the Order field, choose any number. The lower the number, the higher the field will be in the hover popup.
Optionally, give the field a Label. This will be displayed in front of the field value in the hover popup. If you leave this field empty, it will default to the API name of the flow.
...