...
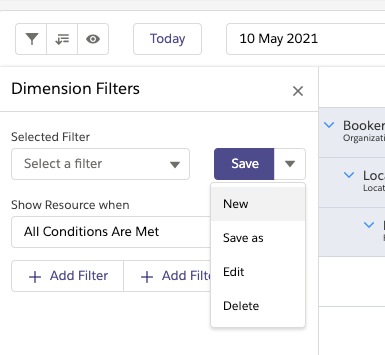
Open a filter panel by clicking on a filter button.
Click on the arrow to the right of the filter selection dropdown and select ‘New’.
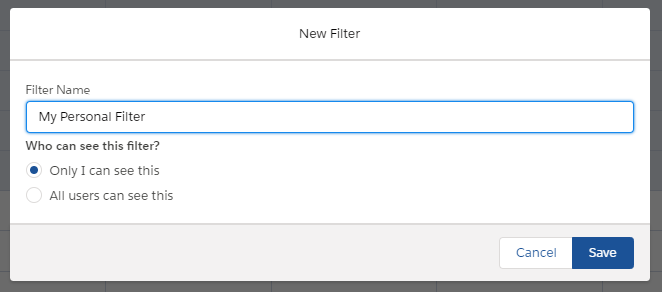
In the modal that opens up, give the filter a name and save it.
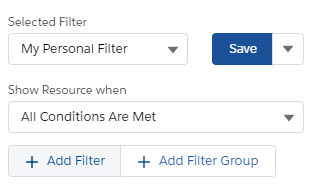
Click the ‘Add Filter’ button.
Click on the newly added filter item to set its properties.
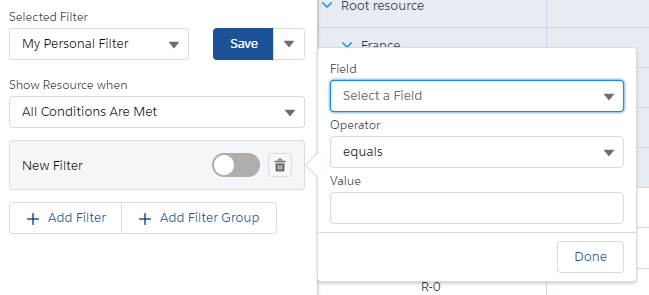
Field: the field this filter should look at.
Operator: the operator to apply (equals, less than, greater than, etc.).
Value: the comparison value. If the field is a lookup, you can search for a record by name.Click Done to save the filter item.
Using relative datetime/date values
...
| colour | Yellow |
|---|---|
| title | soon to be released |
When filtering on datetime/date fields you have the option to use relative datetime/date values to do this click the Use relative date link.
...
Yesterday
Today
Tomorrow
This (week/month/quarter/fiscal quarter/year/fiscal year)
Last (week/month/quarter/fiscal quarter/year/fiscal year)
Next N (week/month/quarter/fiscal quarter/year/fiscal year)
Last N (week/month/quarter/fiscal quarter/year/fiscal year)
Multi-picklist considerations
Given the way multi-picklists are stored in Salesforce, this has implications when adding a multi-picklist filter. Assume a multi-picklist with the following options:
Option 1
Option 2
Option 3
When Option 1 and Option 2 are selected, Salesforce saves this as ‘Option 1; Option 2’. Hence this is also what you will need to provide to the filter in order for it to work.
Option 1 example
...
Option 1 & 2 example
...
Advanced Filter Options
You can create more complex filters by adding additional filter items. You can do this by clicking the ‘Add Filter’ button again.
...