How does Social25 process messages?
The Social25 configuration wizard allows you to define what Social25 does on incoming messages.
This article elaborates on how the Social25 process incoming messages on a technical level.
Assign Social25 Licenses and Permission Sets
In order for users to use Social25, they will need the correct license and permission sets. Licenses are not required in a sandbox, so skip steps 2-4 when working in a sandbox.
- Go to Setup
- Go to Installed Packages
- Click Manage Licenses next to Social25
- Assign licenses accordingly
- Go to Permission Sets
- Assign the Social25 Admin or Social25 User permission sets accordingly, depending on what the user will do
Social25 chat window
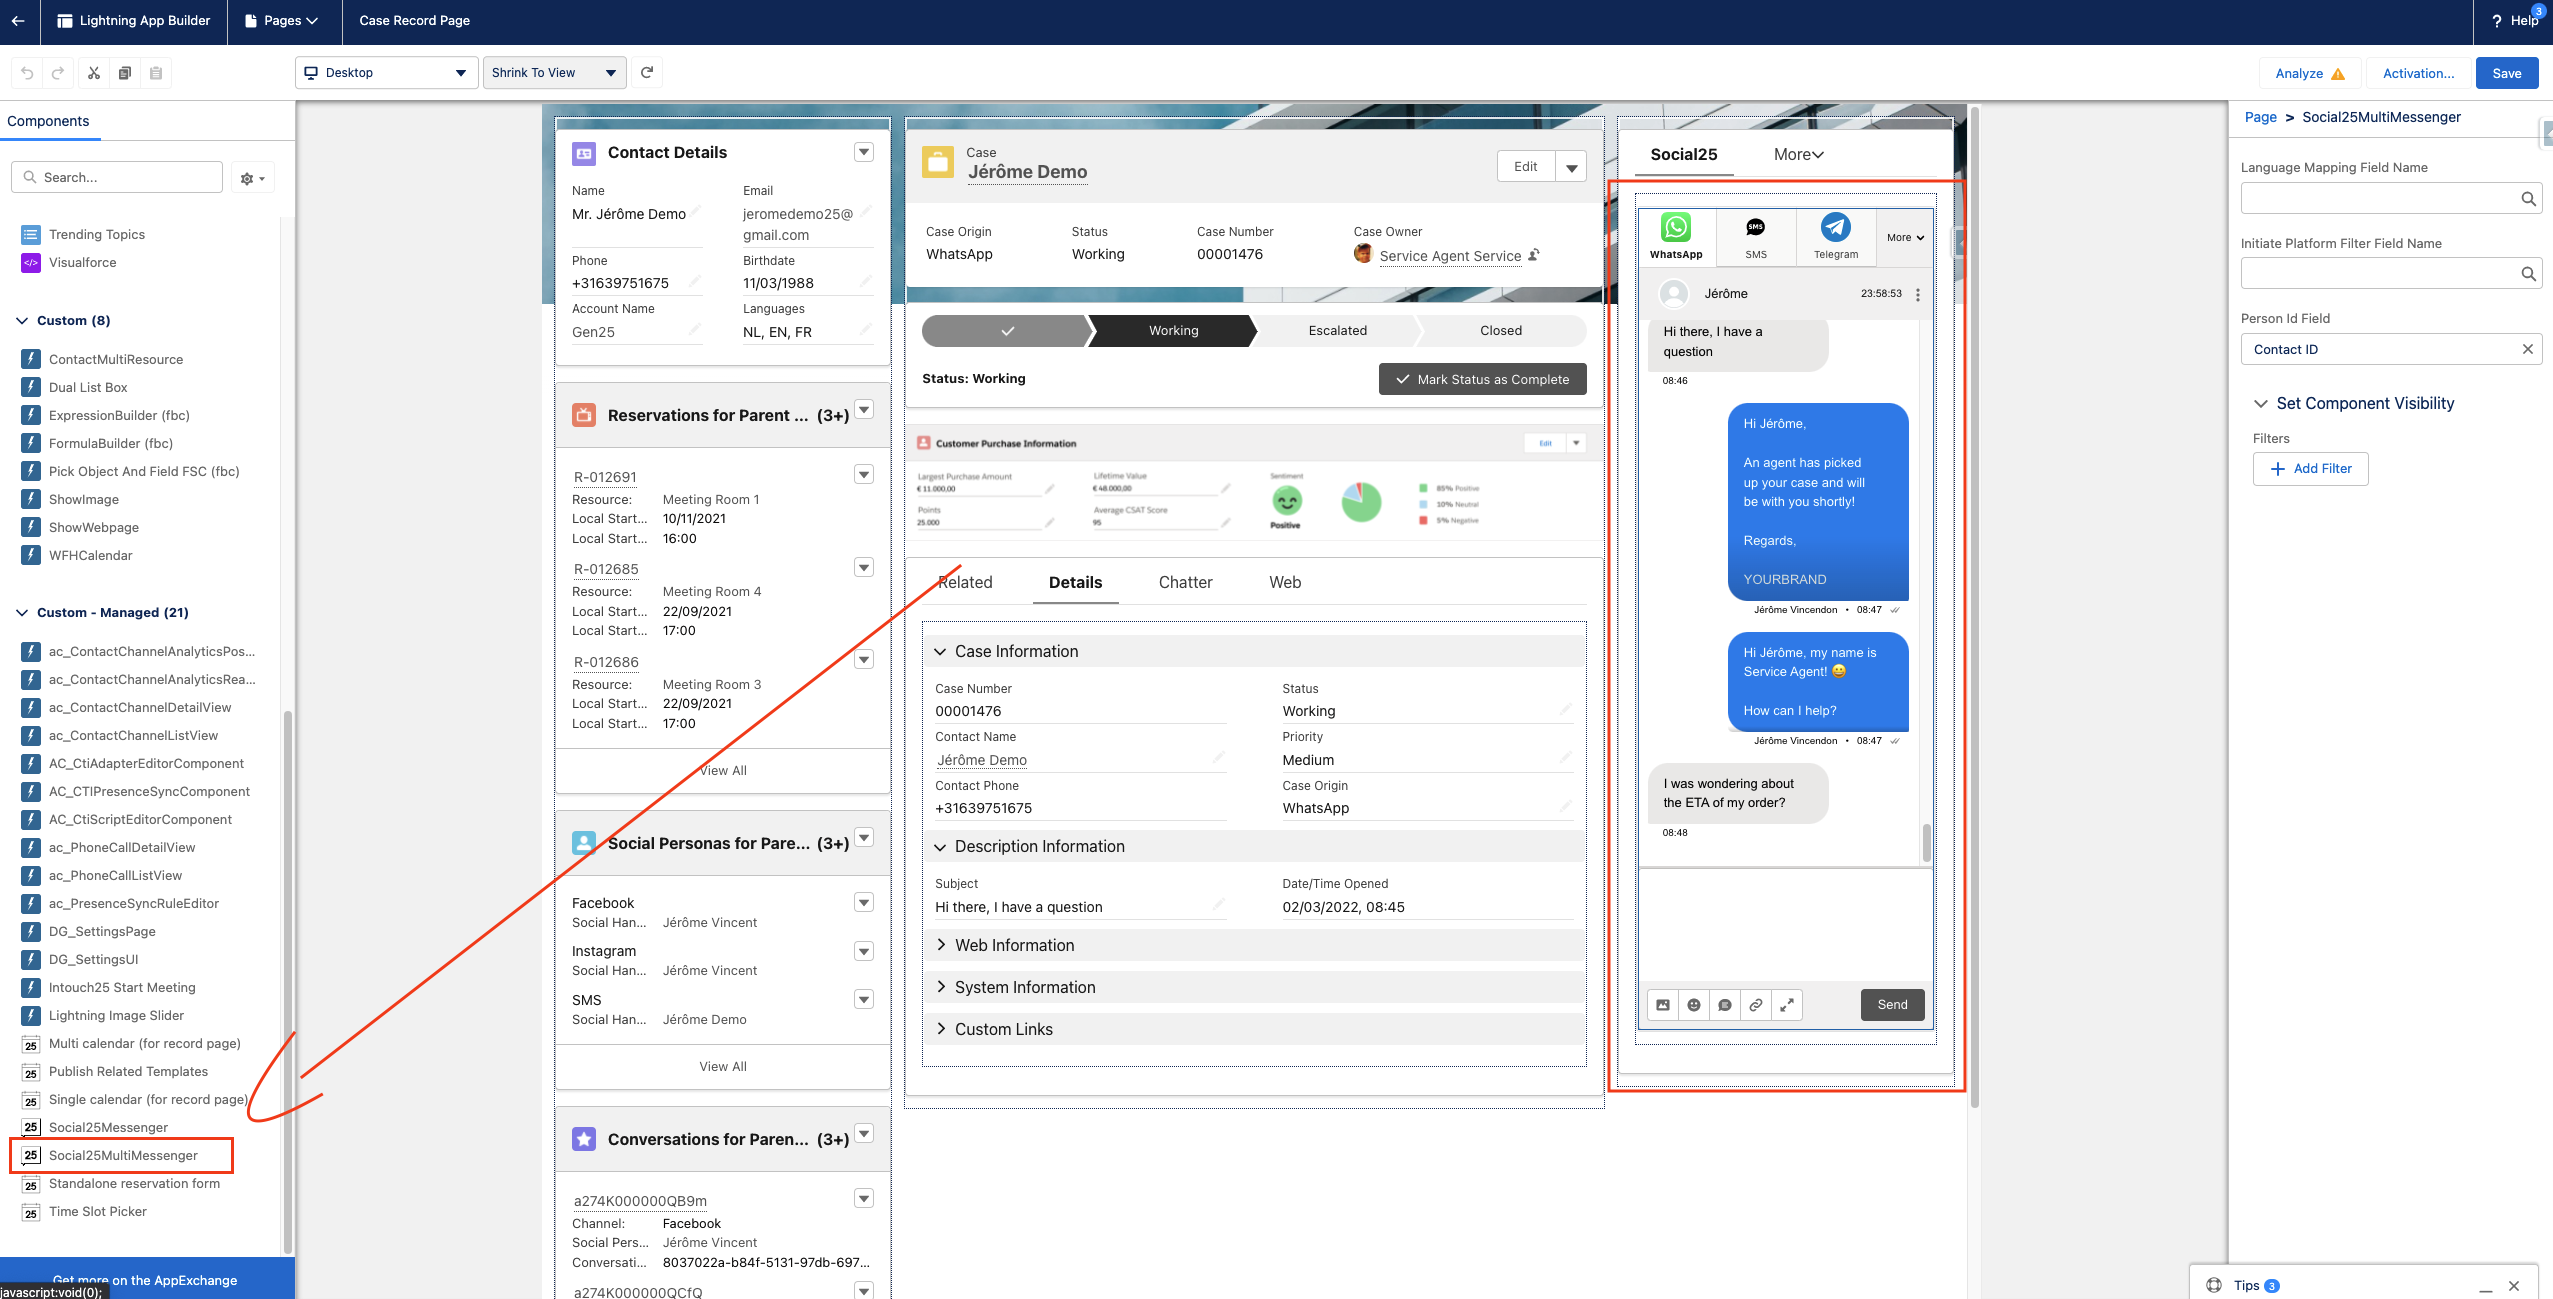
You can set up the Social25 chat window as follows:
- Make sure My Domain is enable on your org, in order to allow Custom Lightning Components to be used: https://trailhead.salesforce.com/en/content/learn/modules/identity_login/identity_login_my_domain
- Edit the Lightning Record Page to which you want to add the chat window
- Add the Social25MultiMessenger Lightning Component to your page

- Make sure to Save and Activate the page for your relevant Apps and Users
Heroku Message
The Heroku Message object is used for all inbound and outbound messages created on the Social25 platform. The only event on this object is the creation of new records. Records are never updated by the Social25 Heroku application. If you're developing custom triggers that trigger if a new message is received make sure to activate your trigger for this object. New incoming messages can be recognised by the Social25__Outbound__c field. A complete ERD of the Social25 package can be found on the Social25 Salesforce Sync page.
Related articles
-
Page:
-
Page:
-
Page:
-
Page:
-
Page:
